| From the Award-Winning Children's Book
Lullaby Moon
Written by Elaine Masters
Illustrated by Tammy Yee
Island Heritage, 2002
ISBN: 0-89610-495-8 |
|  |
| A dreamy adventure about Koa, a little Hawaiian boy who would rather play outside than fall asleep. Koa soon finds himself befriended by an owl, or Pueo, who takes him on a magical exploration of the island's wildlife. Under the watchful gaze of Lullaby Moon, Koa learns how bats, bees and green sea turtles spend their night. With boldly illustrated lift-a-flaps and a musical CD by Malia Elliot, of the popular performing and songwriting duo, Leon & Malia.
More information... |
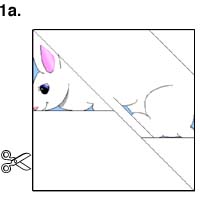
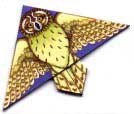
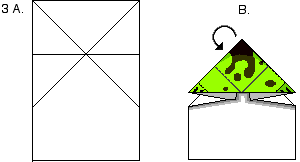
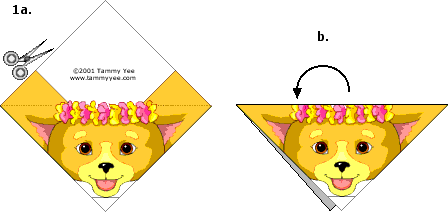
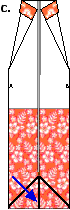
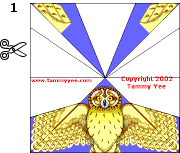 Cut out image along outer solid lines. Cut out image along outer solid lines.
A. Fold in half along diagonal line. Unfold.
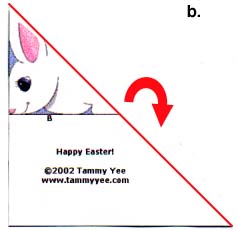
B. Repeat the diagonal fold on other side. Unfold.
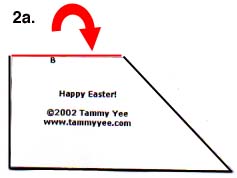
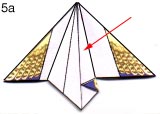
C. Fold down along horizontal line. Unfold.
D. Your origami should be creased as shown.
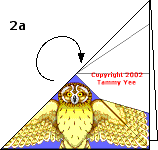
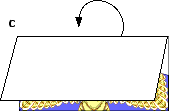
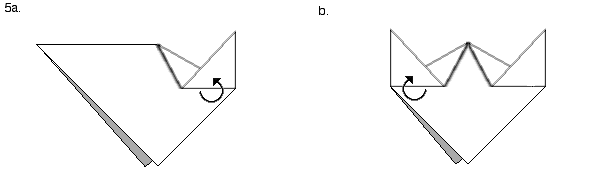
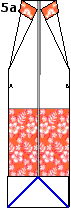
 Carefully fold along creases, forming a "tent" as illustrated. Carefully fold along creases, forming a "tent" as illustrated.
 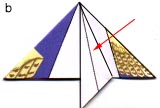 
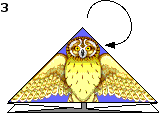
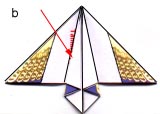
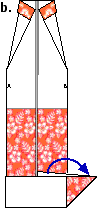
A. Turn origami over.
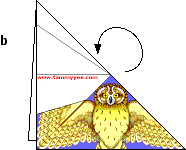
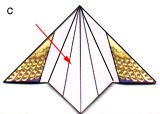
B & C. Fold diagonally on both sides, as illustrated.
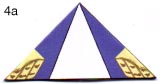
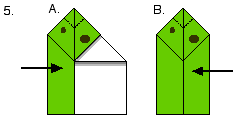
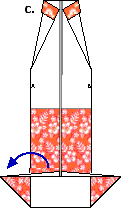
A & B. Form tail by folding diagonally on both sides, as illustrated.
 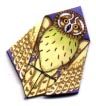
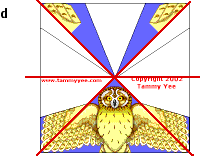
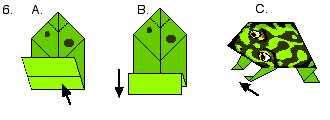
Turn over. You can leave your pueo's wings open or you may fold the wings as shown.
--------------------------------------------------------------------------------
    |
Click on a cat to print your origami!
For more origami projects, Click Here. |
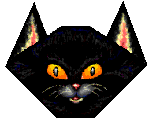
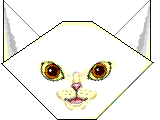
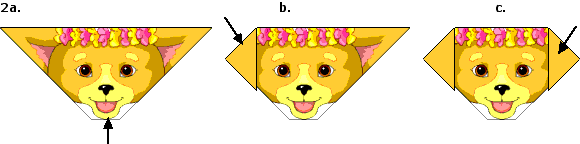
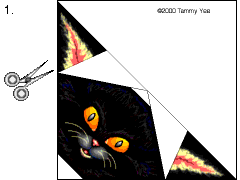 Cut out image along outer solid lines. Cut out image along outer solid lines.
 Fold back along diagonal line. Fold back along diagonal line.
a. Turn your origami over,
b. So that the printed side faces down.
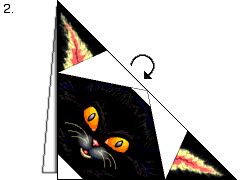
a. Fold down on diagonal line as shown.
b. Repeat on other side.
a. Fold ear up as shown.
b. Repeat on other side.
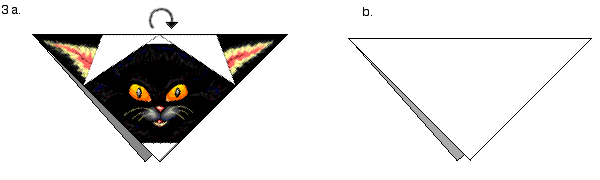
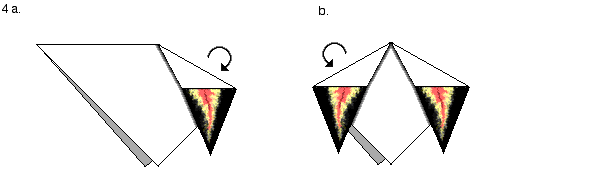
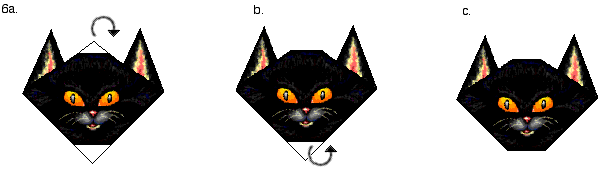 a. Turn origami over with printed side up. Fold back white "tip" on top of cat's head. b. Repeat with the white corner on cat's chin. -----------------------------------------------------------------------------------------------------------------------------------------------------------------------------------
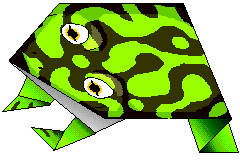
Frog Origami
If you're ready to print your Frog Origami,
Click Here For Green Frog
Click Here For Blue Frog
For more origami projects, Click Here
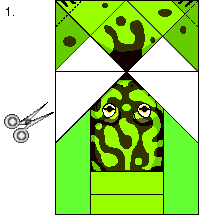
Cut out image along outer solid lines.

A. With printed side facing down, fold along diagonal line.
B. Unfold and repeat the diagonal fold on other side.
C. Unfold and fold back along horizontal line.
A. Unfold. Your paper should be creased as illustrated.
B. Carefully fold along creases forming a "tent" as illustrated.
A. Fold the right "tent" corner up to the "peak" as illustrated.
B. Repeat on the other side. These flaps will form the frog's front legs.
A. Fold left side over to the midline.
B. Fold right side over to the midline.
A. Fold bottom up along the solid line as illustrated.
B. Fold down along second solid line. This will form the hind legs.
C. Fold front legs forward along dashed lines as illustrated.
-----------------------------------------------------------------------------------------------------------------------

Poi Puppy Origami
If you're ready to print your Poi Puppy Origami, Click Here.
For more origami projects, Click Here.
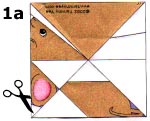
 1a. Cut out image along outer solid lines.
b. Fold in half along diagonal line, as shown.
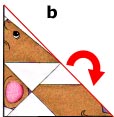
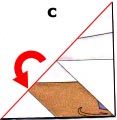
 2a. Fold back along solid line as shown.
b & c. Fold ears forward along diagonal lines. Your Poi Puppy is pau
------------------------------------------------------------------------------------------------------------------------
|
For more origami projects, Click Here. |
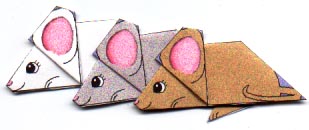
Print mice |
Print Three Blind Mice |
What can you do with your mice?
Have a campfire Bunny Foo-foo Puppet show by taping popsicle sticks onto the back of the mice, fold Bunny Foo-foo, and bop your mice.
Or, fold three blind mice, tape popsicle sticks on the back and have a Three Blind Mice singalong.
OR fold the characters and make a mini-book.
Bunny Foo-foo Rebus
Three Blind Mice Rebus
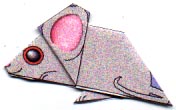
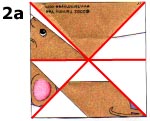
Cut out image along outer solid lines. |
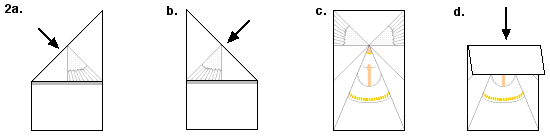
Fold back along diagonal line A.
Unfold. |
Fold back along diagonal line B.
Unfold. |
|
Fold forward along line C.
Unfold. |
|
Your origami should be creased along the red lines as shown. |
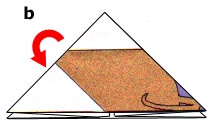
Carefully fold along creases into a "tent" form as shown. |
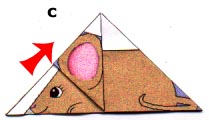
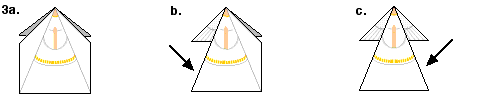
Fold ear up along line D. |
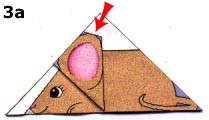
Fold tip of ear back along line E |
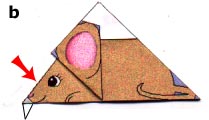
Form head by folding back along diagonal line F. |
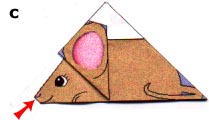
Fold back tip of nose as shown. |
-----------------------------------------------------------------------------------------------------------------------------------------------------------------------------------------
 |
Fold an angel ornament in time for the holidays!
Click here to print your origami!
For more origami projects, Click Here. |

1a. Cut out angel faces along outer solid line (you have two to choose from).
b. Cut out angel body along outer solid line.
c. Turn angel body over so that printed side is facing down.
2a. Crease along diagonal line "A". Unfold.
b. Crease along diagonal line "B" as shown. Unfold.
c. Turn paper over so that printed side faces up.
d. Crease down along horizontal line "C". Unfold.
3a. Carefully fold back along creased lines to form a "tent" as shown.
b. Fold angel's robe back along line "D".
c. Fold angel's robe back along line "E".
Your angel's wings should be visible behind robes, as shown.
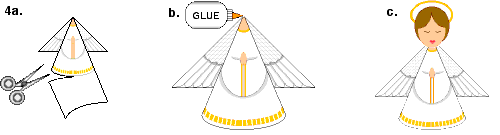
4a. Trim bottom of angel's robes along line "F".
b. Dab a spot of glue on angel's neck (or you may use tape).
------------------------------------------------------------------------------------------------------------------------------------------------------------------------------------
 |
Fold a jolly Saint Nicholas in time for Christmas!
Click here to print your origami!
For more origami projects, Click Here. |
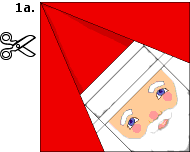  
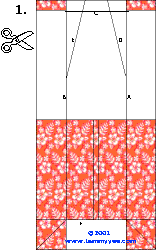
1a. Cut out image along outer solid lines.
b. Turn over so that printed side is facing down. Fold diagonally along line A.
c. Repeat diagonal fold along line B.
|
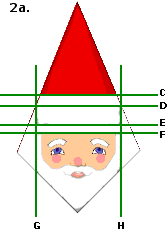
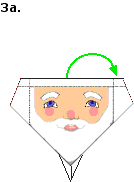
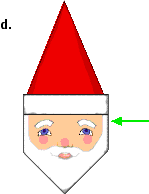
2a. Turn Santa over so that the printed side is facing up. Take careful note of the lines as labeled. |
b. Fold forward on horizontal line "C" as shown.
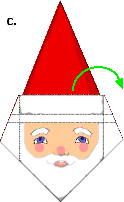
c. Fold back along horizontal line "D" as shown.
|
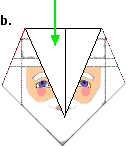
 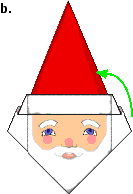 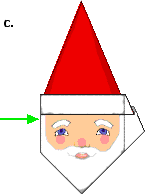  3a. Fold back along horizontal line "E".
b. Fold forward along horizontal line "F".
c. Fold back along vertical line "G",
d. Then fold back along vertical line "H". Your Santa origami is pau (finished)! Merry
------------------------------------------------------------------------------------------------------------------------
אביזרים:

Aloha Shirt Origami
If you're ready to print your Aloha Shirt Origami, Click Here.
For more origami projects, Click Here.
|
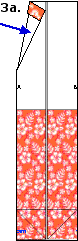
1a. Cut out image along outer solid lines.
b. Turn origami over so that printed side is facing down. |
2a. Fold along vertical line A.
b. Fold along vertical line B.
c. Fold collar back along horizontal line C. |
|
 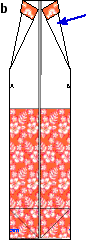
3a. Fold along diagonal line D.
b. Fold along diagonal line E.
Now your collar is finished. |
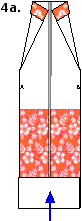  
4a. Fold up along horizontal line F.
b. Crease diagonally as shown.
c. Repeat diagonal crease on opposite side as shown. |
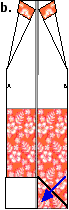
5a. Unfold the diagonal creases you made in steps 4b and 4c.
Your origami should have diagonal crease marks as shown by the blue lines.
b. Pull sleeve out along diagonal creases as shown.
c. Repeat on opposite side as shown. |
Fold body of shirt up, under collar as shown. Now your Aloha Shirt is


|
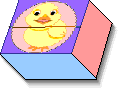
Click here to print your Shamrock Box!
Easter Chick Box for Easter Treats
Click here to print your Easter Chick Box!
Pumpkin Box for Halloween Treats
Click here to print your Halloween Pumpkin Box!
For more origami projects, Click Here. |
|
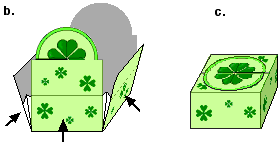
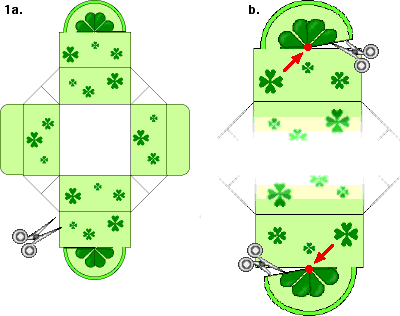
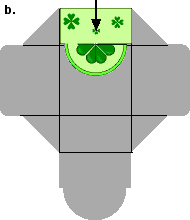
| 1a. Cut out box along outer solid line.
b. Make cuts on the "shamrock halves" as shown, along the black lines only. Do not cut beyond the points indicated by the red dots. |
 |
   |
| 2a - d. With printed side facing down, fold and unfold along the solid black lines as indicated, to form the sides of the box.
2e. Your box should be creased as shown. |
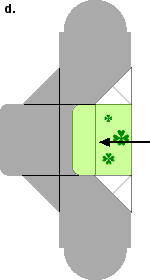  |
3a-c. Repeat the process along the outer lines to form the lid of the box.
d. Your box should now be creased as shown. |
|
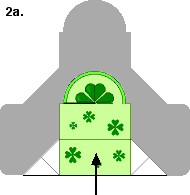
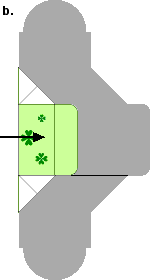
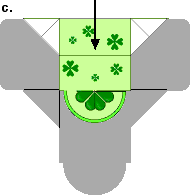
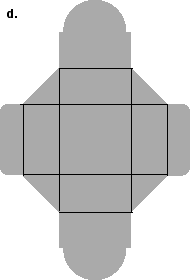
| 4a. Take note of the diagonal lines marked in red. |
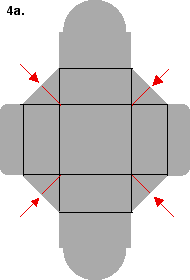 |
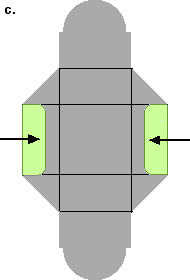
| b. As you fold the sides of the box up as shown, you will make creases along these diagonal lines to form the corners of the box.
c. Secure the box by interlocking the shamrock halves along the cuts you made in step 1b.
----------------------------------------------------------------------------- |
------------------------------------------------------------------------------------------------------
| | | | | | | | |